Install Requirements
This document contains all the necessary steps to install and cofigure GitHub and Docker.
Docker
- Install Docker desktop. To make sure it is running properly, type
Docker pson the command line(CMD) or on the terminal make sure its runnning properly, for example by typingdocker psin your terminal or command line (CMD). If all is ok, you should be seeing something like:
CONTAINER ID IMAGE COMMAND CREATED STATUS PORTS NAMES
Git
You can set up Git through the command line or through GitHub desktop.
Installation
Make sure you have Git installed. Usually, git is already installed as a default option in linux, mac and windows machines, if this is not the case for your machine, simply follow the instructions in this link.
Configure
You can configure your GitHub account either from the command line or from the Desktop GUI interface. For additional documentation on setting up your GitHub account follow this link.
Set a GitHub account online by following the prompts.
Configure Git using the command line or terminal:
git config --global user.name "your_github_user"
git config --global user.email "your_github_email"
Install GitHub Desktop (reccomended but not compulsory).
Sign in with your GitHub account on GitHub Desktop. GitHub desktop will automatically detect the GitHub username and account used to configure your machine. More informations on GitHub, the Desktop app and the machine configuration can be found here.
Create a Git access token
To access the TDT you need a personal access token from GitHub. A personal access token is a string of characters that is used to authenticate your account when accessing online resources (i.e. the TDT database) instead of using your password. You should keep your personal access token as a password. Here there are the steps to generate a personal access token.
What do you need to generate a personal access token:
- A GitHub email account.
- Git configured on your machine.
- A GitHub mobile app for autentication.
On GitHub there are two type of personal access token: classic and fine-grained. For the TDT you need to generate a fine-grained personal access token.
Login to the GitHub webpage and autenticate your e-mail.
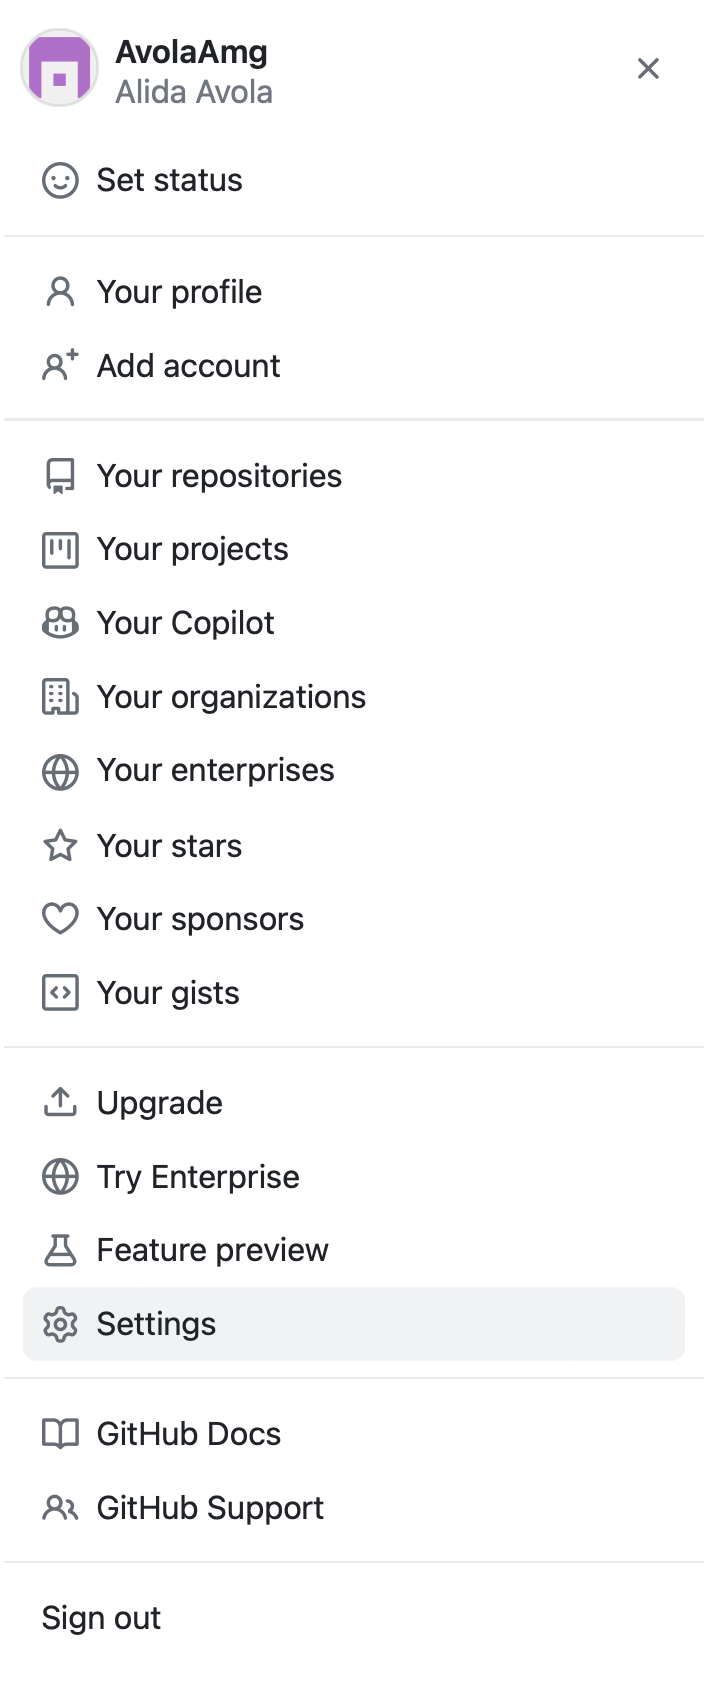
In the top right corner of the dashboard, select your account profile:

On the side menu select settings.
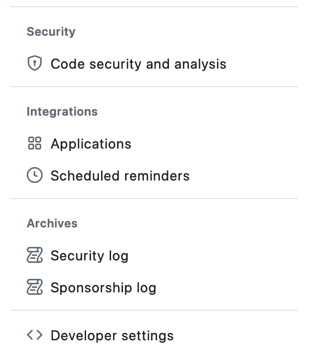
In the settings menu, at the bottom of the left side bar, select < > Developer settings.
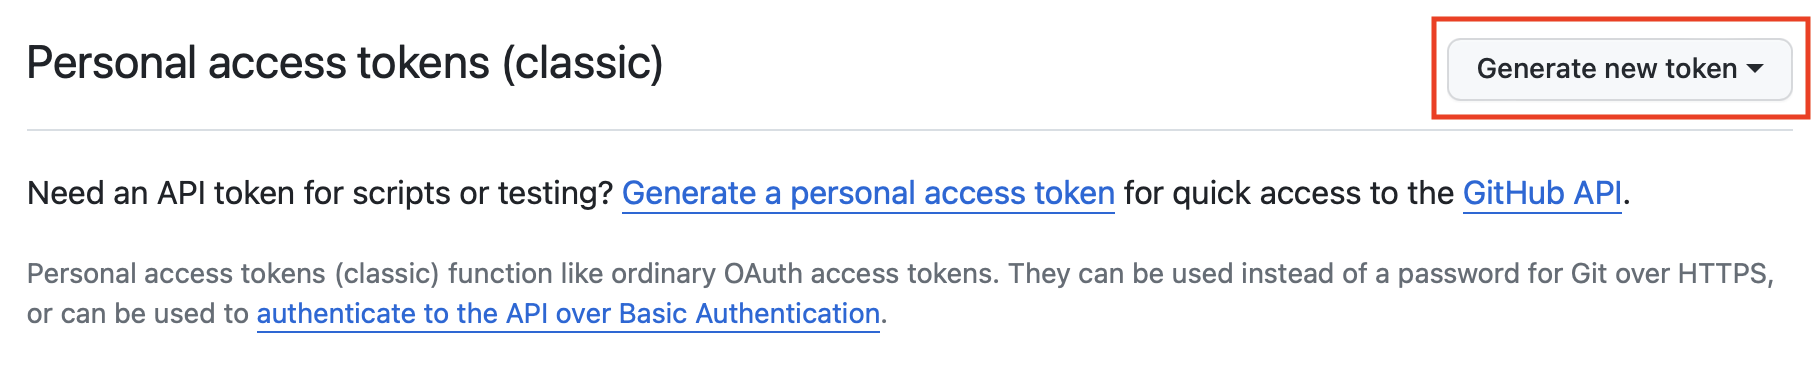
On the left sidebar, select the Personal access tokens, on the dropdown options select Tokens (Classic).

Select Generate a new token and on the dropdown menu select Generate a new token (classic) This step will require autentication with the mobile app.
Add a note specifying the use of the token and call it "Taxonomy_development_tool".
Under the Expiration dropdown menu select the option no expiration.
Under the Select scopes list select the option repo and read:org.
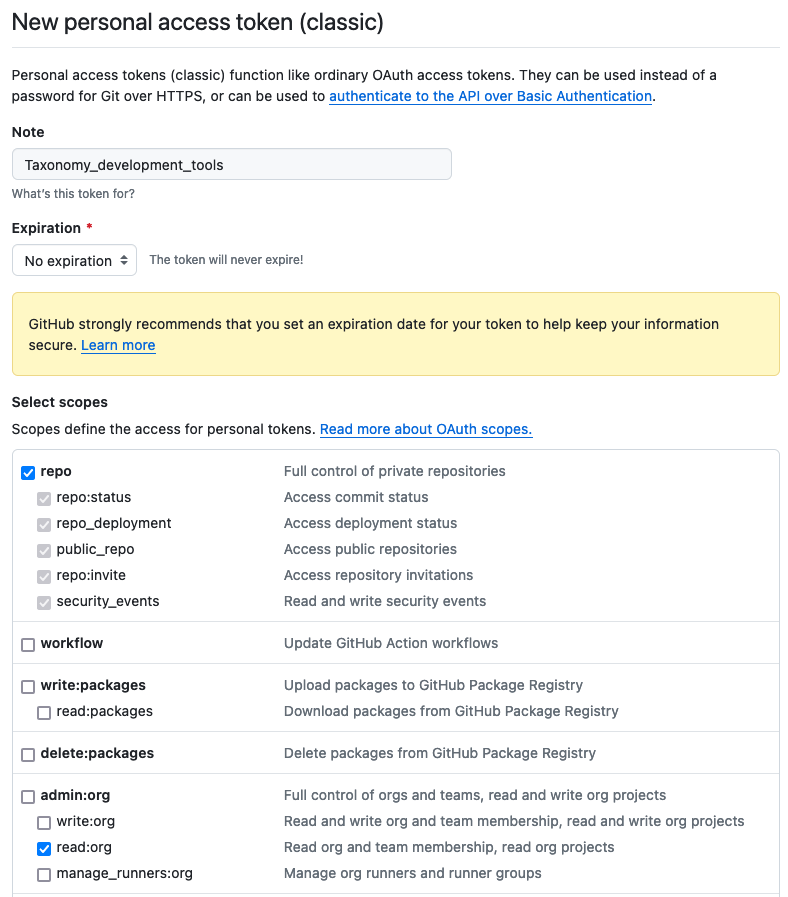
At the bottom left of the page, select Generate token. Save this token on a text editor and keep it secure. It will be needed for the downstream steps.

Once you've created the new token, it may be necessary to execute the command git credential-cache exit to clear the old token, preventing any potential conflicts.
Set GH-TOKEN environment variable
To configure the GH_TOKEN environment variable, please follow the instructions specific to your operating system.
For Linux and macOS:
- You can use
nanoor any other editor to edit the files.
For bash (Linux):
nano ~/.bashrc
For zshrc (MacOS):
nano ~/.zshrc
- This way you would open the 'zshrc' file (in MacOS) or the 'bashrc' (in Linux). When the file opens, add the environment variable in a new line and insert the personal access token generated in the previous steps :
export GH_TOKEN=my_github_personal_access_token_here`
Save and close the file, if you are using nano press crtl+X to exit and Y to save the file.
- Reinitialize the configuration file to apply the changes to the current session:
For bash (Linux):
source ~/.bashrc
or zshrc (MacOS)
source ~/.zshrc
- Test your new config open a new Terminal and run:
echo $GH_TOKEN
your GitHub access token should be displayed.
For Windows:
Open the command line and type:
setx GH_TOKEN my_github_personal_access_token_here
- To test your new config open a new Command Prompt (Terminal) and run:
echo %GH_TOKEN%
Taxonomy Development Tools Docker image
The Docker image for Taxonomy Development Tools (TDT) will be automatically fetched and installed on your system if it is not already present.
To explore the TDT Docker image and its version history, visit the GitHub Container Registry.
Manual Download of the Taxonomy Development Tools Docker Image
Should you prefer to manually obtain the TDT Docker image, execute the following command:
docker pull ghcr.io/brain-bican/taxonomy-development-tools:latest
Build Taxonomy Development Tools (Optional)
This step is optional and specifically aimed at users interested in utilizing the development branch of the TDT. Please note that the development branch may exhibit instability.
For those looking to use the TDT, it's recommended to follow the Get Taxonomy Development Tools section to obtain a TDT Docker Image. However, as an alternative, you have the option to build the TDT Docker image locally. To do this, clone the project repository and execute the provided command within the root directory of the project:
docker build --no-cache -t "ghcr.io/brain-bican/taxonomy-development-tools" .